GDAL is a useful command line to process spatial data, and the installed Python libraries allow for the use of GDAL tools directly in Python code.
GDAL can used to:
- Create contours from a DEM
- Reproject between coordinate systems
- Convert between rasters and vector data types
- Build image mosaics
Each of these tasks can be run from the command line, or imported as a Python function.
This tutorial outlines the steps involved in installing GDAL on a Windows PC. Note, in the tutorial we are assuming the use of Windows 7. Installing GDAL on a Mac is covered here.
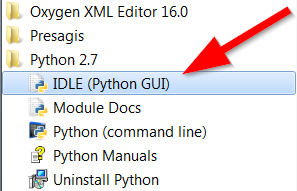
Step 1: Check Python version
Python is required for GDAL, and in this tutorial, we assume that you already have Python 2.7 installed, most likely as part of your ArcGIS Desktop installation.
To find out what version of Python you have installed:
-
Go to Python -> IDLE (Python GUI) in your Start menu
-
Make a note of the number that shows the version of your installed Python in the top right, as highlighted below:
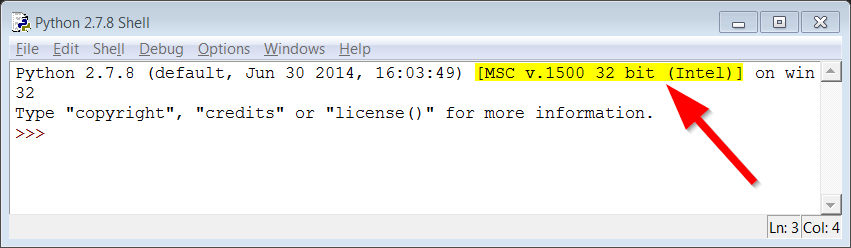
Please Note: MSV v.1500 may differ based on your different Python installation. If it does,
please make a note of that number. Also, if you installed the 64-bit version of Python, for the
rest of the tutorial please remove the (x86) from the paths.
Step 2: Install GDAL
-
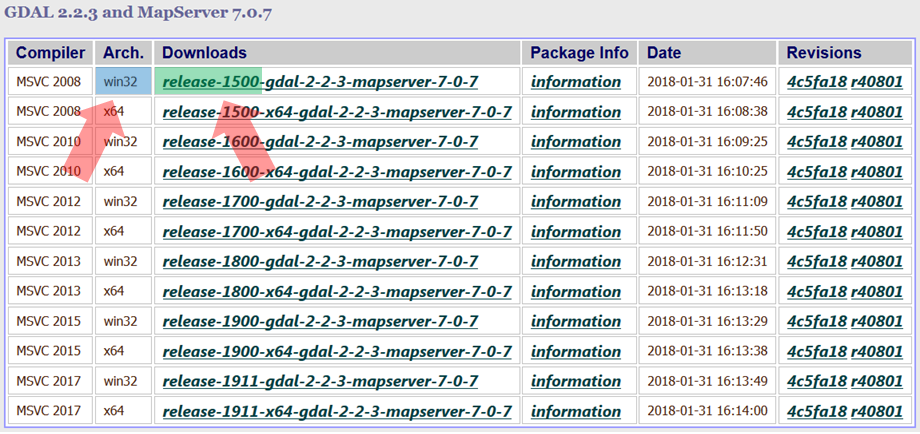
Go to Tamas Szekeres’ GIS Internals site, and click on Stable Releases, to download the appropriate GDAL binaries (i.e. installers).
For this tutorial, we assume you are using ArcGIS 10.4 or greater, so you will most likely be using the MSC v.1500 on a 32-bit system. The image below illustrates how the the GDAL version with your installed Python version. The blue highlight indicates whether you should look for 32-bit or 64-bit systems, and the green highlight indicates the release-1500 number which should match the number from IDLE in step 1 above.
-
Click the appropriate link, which will take you to the list of packages to download.
-
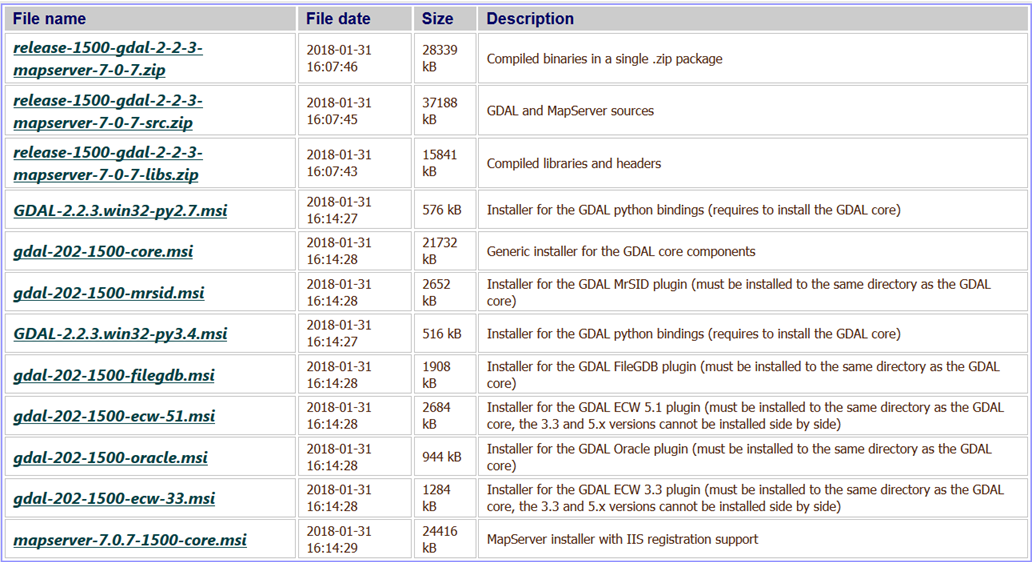
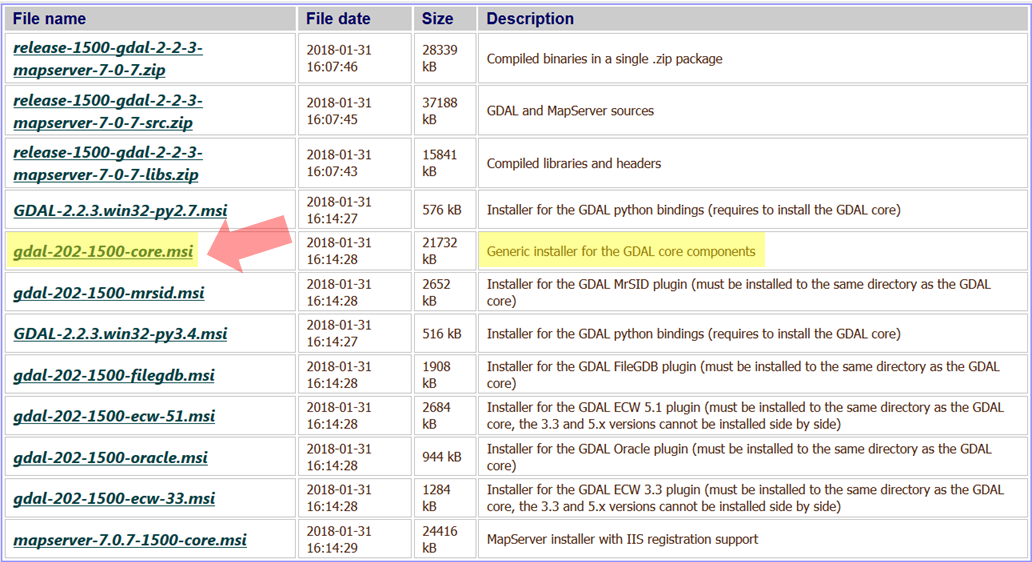
Locate and download the “core” installer, which has most of the GDAL components.
-
After downloading your version of the
core.msiinstaller, install GDAL with standard settings. -
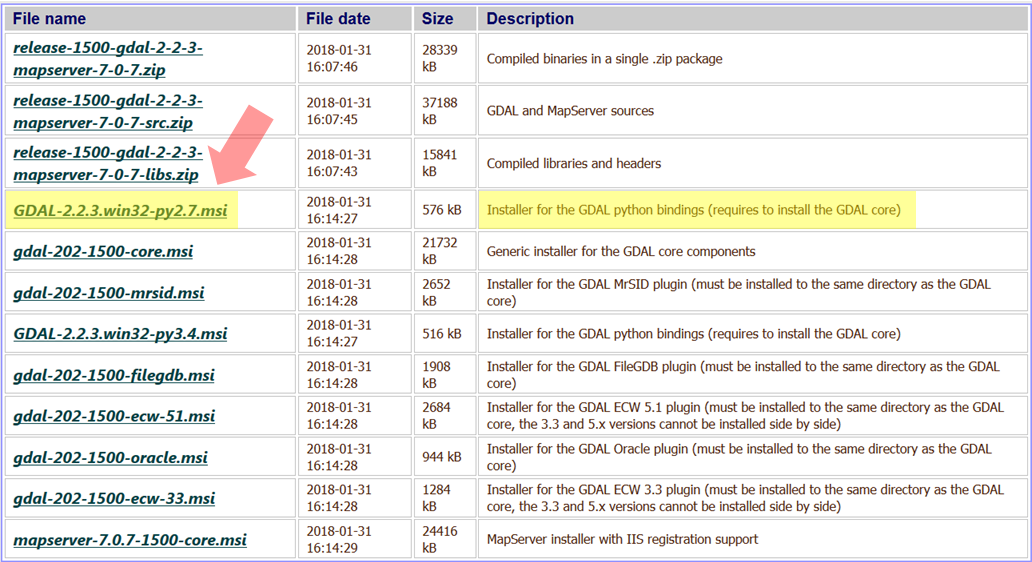
Next, return to the list of GDAL binaries, locate and download the Python bindings for your version of Python, which should be 2.7.
-
After downloading the Python bindings, install them.
Step 3: Adding environment path variables
We need to tell your Windows operating system where the GDAL installations are located, so we need to add some Windows environment system variables.
-
Click on the Windows Start button
 and in the “Search programs and files” text box, type in “System Environment Variables”, then select
“Edit the system environment variables”.
and in the “Search programs and files” text box, type in “System Environment Variables”, then select
“Edit the system environment variables”.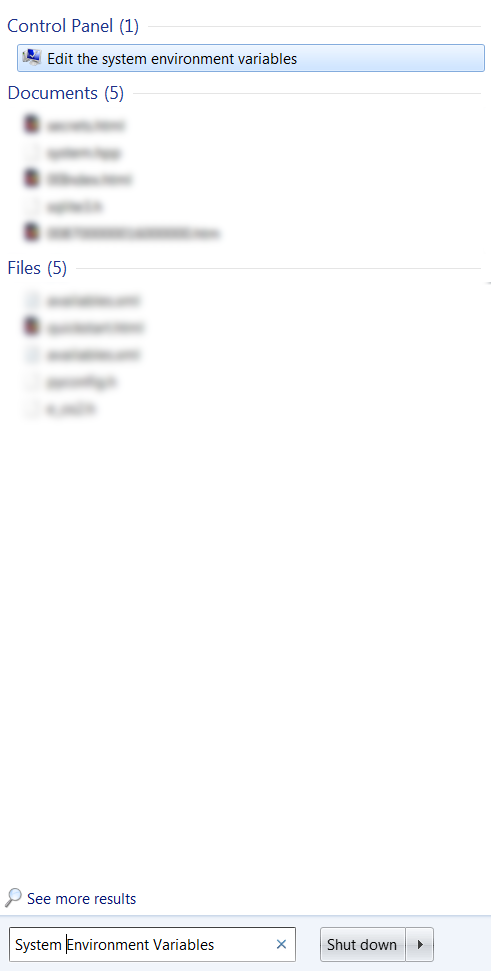
-
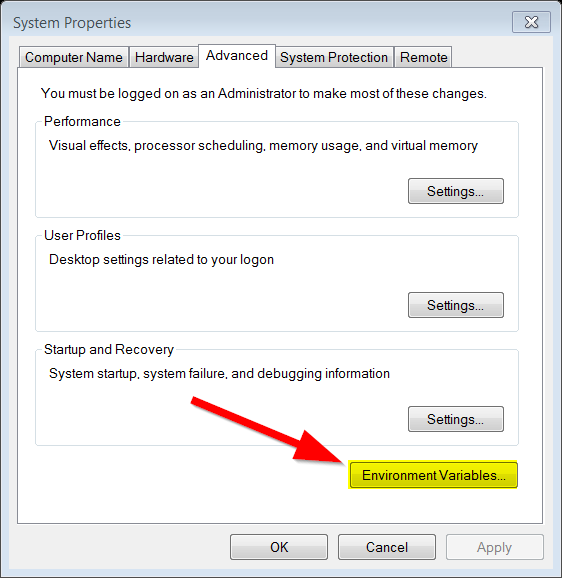
Once the “System Properties” dialog is open, click the “Environment Variables” button.
-
In the “Environment Variables” dialog, under the “System variables” pane, select the “Path” variables, then click the “Edit” button.
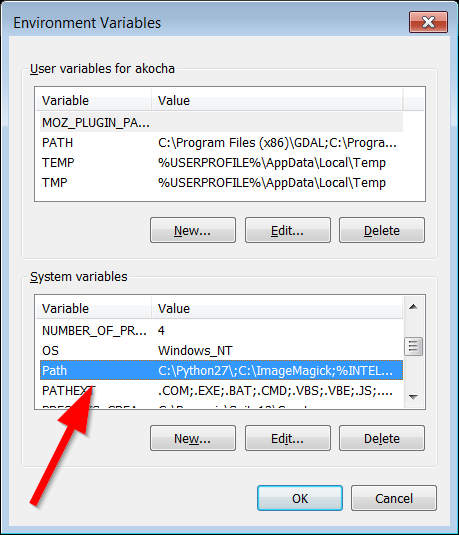
-
In the “Edit System Variable” dialog, in the “Variable value” text box, go to the end of the text string, and copy and paste the following:
;C:\Program Files (x86)\GDALPlease Note: For the 64-bit GDAL installation, you would simple remove the (x86) after Program Files.
-
In the “Environment Variables” -> “System variables” pane, click the “New…” button, and then add the following in the dialog box:
Variable name:
GDAL_DATAVariable value:
C:\Program Files(x86)\GDAL\gdal-data
Click “OK”
Step 4: Testing the GDAL install
-
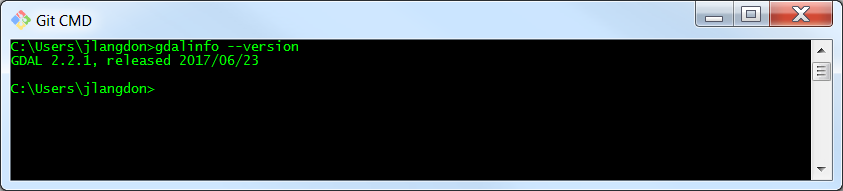
Open the Windows command line, by going to the Start menu ->Run -> type in
cmdand press “Enter”. -
At the command line prompt, type in
gdalinfo --version. -
If you get the following result, congratulations! Your GDAL installation is complete!
This walkthrough is derived from Albert Kochaphum’s tutorial at UCLA Sandbox, including some text and images.